Thursday, July 30, 2009

Another One of My Helpers


I went in to make the last of my Christmas in July cards, and there on my desk was another of my helpers. Now this one is my cat and even I must say she is not the brightest of the bunch (there are 3 cats and 2 dogs and she was definitely behind the door when the brains were handed out). Her name is Biscuit (she was named by her previous owner and didn't take kindly to a name change when we got her as a 2 year old, so Biscuit she still is 3 years later). This one really likes to help and she is so clumsy - I have had coffee spilt all over my just completed cards (boy she was not popular that day) glitter spilt everywhere and even 5000 beads all in their separate colours hit the floor - what could be salvaged is now a multi coloured container of beads.
Anyway despite her help I finished this last card:


Stamps: Christmas Classics

Card: Old Olive, Real RedAccessories:

Versamark, Silver Embossing Powder, White Embossing Powder

Ink: Old Olive, Old Olive Marker, Red Kindy Glitz

Wednesday, July 29, 2009

Christmas In July

Just a few more cards for Christmas in July, a couple using the new Tree Trimmings set. With the first two cards I embossed with gold embossing powder onto coloured cardstock and them applied crystal effects to give it that shiny baubly effect. The tree around the edge were from the Lovely as a Tree set. The Merry Christmas has been punched out with the new Scallop Oval punch.

This card used the new Ski Slope Design Series Paper in the new mini starting on August 1st


This third card was done with the Snow Swirled Stamp Set and the new Riding Hood Red striped ribbon.

Tuesday, July 28, 2009

Mojo Monday Week 97

Here is this weeks Mojo Monday sketch which I had fun with but as you can see below my little helper did not want me to photograph it he thought it was his new toy. So after he had knocked it down twice I finally got a photo - I think the ribbon is a bit crooked after being knocked down so many times.
Card: Almost Amethyst, Old Olive
DSP: Tea Party
Stamp: Oval All (embossed in white)
Lots of cutting out - the flower was cut out three times and layered with dimensionals.
The first picture is the culprit(Franklin) at work trying to help as he knows what a bad photographer I am and I think he was just trying to place the card in a better position to catch the light (I think the sun must be getting to me if I thought for one minute Franklin would ever do anything nice to help). You can see there is no card in the photo - that was the first time he knocked it onto the ground.

Here he is after his second attempt - he really is such a naughty boy!!!!!!


Wednesday Tutorial on Splitcoaster


Splitcoast Stampers is a great site to get lots of ideas and Tutorials. Last weeks tutorial was for the flower pot - which has been immensely popular lately. I had made two of these back in April to give to friends for their birthdays, so I thought I would pop a photo on here and a link to the Splitcoast tutorial. I made this with Taken with Teal, Regal Rose and Purely Pomegranite (retired) and Bali Breeze (retired), The flowers were stamped three times each with Fifth Avenue and each layer cut a little smaller than the previous one and layered with dimensionals, and yes there is some glitter on each flower, not that you can see it all that well but it is there.

Sunday, July 26, 2009

A Quick Follow Up On Technical Difficulties

All the expert photographers in this household have been putting in their five cents worth regarding my not quite up to scratch photography skills (okay if I am really honest poor photography skills). They felt the floral white background was not quite right, so I changed it for a white towel and Franklin as usual had to come and help as well. (his name came about when all the Franklin stores were around and they carried the No Name brand and since we couldn't think of a name we called him Franklin (no name) most people think he was named after Franklin Roosevelt but he is not that grand)

Not that you can see much of the white towel because he is such a fatso!! The girls rescued him from the Lost Dogs home - they went in to get the rabbit looked at (that is a whole new story as to why we had the rabbits) and saw this tiny lovable little kitten and just had to bring him home. It turned out he was just very sick and after at least 5 trips back to get him better, his true colours have emerged. He terrorizes the whole neighbourhood, even our golden retriever Molly runs away from Franklin when he is in one of his moods and he thinks he is the king of the household. (when he is a good boy which is not very often he really is a lovely cat).

Anyway getting back to the photography part I took my card below on the white towel after turfing Franklin off again - I really don't know that the white towel makes any difference, maybe a new camera and some photography lessons might be the go!!!


I saw this card on Sue Madex's site and knew it would be just perfect for a 50 year old birthday I am going to today. This friend loves things that are different and lots of bling ( just like me) so I thought this card would be great. Thanks to Mary her guest card maker for the brilliant card I think it is great. It is really quite a quick card except for getting the stars to stay in the right places. All the stars have glitter or bling on them (of course) and with the two star punches it is a matter of punching out the stars and decorating them.

Saturday, July 25, 2009

Technical Difficulties

Being new to this blogging game and not being the worlds greatest photographer it is a bit of an uphill battle to get it all looking OK. I was told I need to photograph on a white background so I set it all up and went to get to get the card to take a photo. I came back 2 minutes later to find my helper there and there was no way he was going to move out of the way for me. After some gentle persuasion (a food bribe you can see he is fading away to a shadow) I finally got this photo done.

Another Z Fold Card


I love the colours in this card - I have used Riding Hood Red Card teamed up with the Candy Lane DSP. I think the pinks and reds and browns go together really well. The little elephant is so cute holding the flower which was punched with the Boho Blossom punch and then a dimensional put under it to make it stand out a little more.

The elephant was stamped in chocolate chip and the words were stamped in riding hood and if you look closely there is a little rhinestone in the middle of the flower (what is a card without a little bit of bling)
The edging was punched with the eyelet border

Z Fold Cards


We have been making lots of these Z Fold cards with all the animals from the Wild About You and trying out different Stampin Up papers and different colour card. The Haiku DSP matches up with the new In Colour Tangerine Tango Card and the colours look really good together


Here is a picture of the card open and you can see the lion has been stamped with Tangerine Tango and the words with Old Olive. The Scallop Punch was used to create an interesting edge to set off the lovely papers (with a touch of kindy glitz around his mane which doesn't really show up all that well).

Thursday, July 23, 2009

Mojo Monday Week 96

I thought I would have a go at Mojo Monday with the lovely Rose is A Rose set from Stampin Up. Although it has taken me till Thursday to to get organised to make the card I finally got it finished, better late than never.

It certainly makes it easy to think up a card when the card design is given to you, once you decide on the colour off you go and the card is made in no time. The longest part is cutting out the roses (cutting out has never been my strong point), but with these roses you can cut where you like so it doesn't really matter if it is a little bit crooked.Here is a copy of the sketch which you use as your guide.

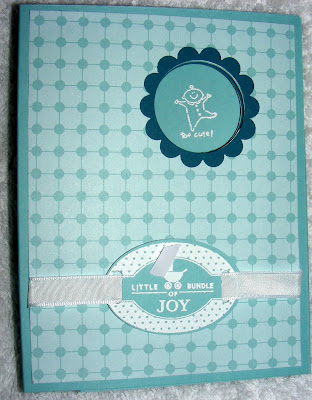
Here is my version of Mojo Monday Week 96.


. Stampset: A Rose is A Rose
Cardstock: Whisper White, Cameo Coral
DSP: Pink Flamingo
Inkpads: Cameo Coral, Old Olive
Accessories: Stampin up Ribbon Originals and Dazzling Diamonds

Paper Napkin Transfer

Whilst on the Christmas theme a friend gave me some absolutely beautiful paper serviettes, so I am just revisiting an earlier class - paper napkin transfer and popping in an extra card.


The second flower card just has the most wonderful colours in it and looks fabulous made up into a card. Its a waste to use them as serviettes. Everyone that came to the class says they can't help themselves when they go into a shop now they have to look at the serviettes. One lady says they will be having barbeques every night in summer to use up all the serviettes she bought. (It is a bit addictive once you get going)

Lots of Glitter

I've had a whole month without glitter so next months cards will have lots of glitter on them. As everyone is doing Christmas in July I thought I might try a few Christmas cards with some glitter (actually lots of glitter) on them. We won't actually be doing Christmas cards in the next class but we will be using this glitter technique on a pop up card. I could probably add a Merry Christmas on front of the card to finish it off.

Cardstock: Garden Green and Very Vanilla

Stampset: Season of Joy

Inkpads: Garden Green and So Saffron

Accessories: Glitter, glue(a special kind to give the raised effect) and Nestabilites

The tree was embossed in gold and then the three different colour glitters were applied, they are much more sparkly in real life. I went around the edge of the oval with a gold pen and then sponged garden green and so saffron around the tree.
This card was done using the same technique but with the metallic cardstock.
Tomorrow I will show you another couple of Christmas cards I have been playing around with

Saturday, July 18, 2009

Classes we have done this year

Here are some of the cards we have been doing in classes this year, so if you are interested in trying new techniques there is something sure to interest you. The first card is done using the glitter window technique and the ever popular Priceless set.


The second card was the stained glass window technique (using acetate sheets instead of normal cardstock) which was very popular and everyone was very glittery by the time they finished, but very happy with the card they all finished up with. The stamp set used was the Embrace Life
This is another card made using the stained glass window technique and the Fifth Avenue stamp set.

Thursday, July 16, 2009

Interesting cards

I thought I would show you some of the cards I have made over the last six months some have been done at classes and some just for fun. The first lot of cards are ones using the recessed window template that I found on Splitcoast stampers (you can get lots of wonderful ideas from this site)


This card was made using Urban oasis and Haiku DSP along with the Fifth Avenue stampset


This second card also used the Urban Oasis DSP and the stampsets were Wild About You and the background was the Sanded stamp. I'll be back in a couple of days with some more cards we have done. Thanks for looking.

Tuesday, July 14, 2009

The last of the Peek A Boo Card

With this card I used the very popular Cheers To You Stamp set and highlighted the contents of the cocktails with glossy accents which gives a great finish to the card. We have been having great fun making these cards here, as they can be used for just about any occasion. I have had a couple of requests to incorporate this in a future class, so keep a look out for these in an upcoming class.

The inside of the card has photographed blue, when the cardstock used was Almost Amethyst. The colour is pretty accurate in the first photo, so I don't know what went wrong in the second one as it was taken straight after the first one and in the same spot. I think the problem must be the dodgy photographer (me!!). I think there might be lots of room for improvement there.

Monday, July 13, 2009

Another Peek A Boo Card

This is another Peek A Boo card I made for a friend who has just had her first grandson, I think I am getting to that age now where there might be a few friends having grandchildren so I will have to get into baby card mode again. I love this style of card because you can use all those little stamps that often get forgotten. Oops I think there is a bit of ribbon on the picture the card has gone I can't take another picture, but you can see it is pretty cute.

Saturday, July 11, 2009

Peek A Boo Cards

Look what a friend made for my birthday isn't it great? (My birthday was a little while ago but it has taken me some time to get around to making them) So of course I just had to make several didn't I ... the tutorial for making these peek a boo cards is on Michelle Ide's blog . The results are just fabulous (after a few mistakes and a few things stuck on the wrong way I got the hang of it.). I'm sure a few more of these might appear on my blog. I will show you one today and save the other one for another day.

When you open the card a different message slides across inside - even my kids thought it was pretty cool.
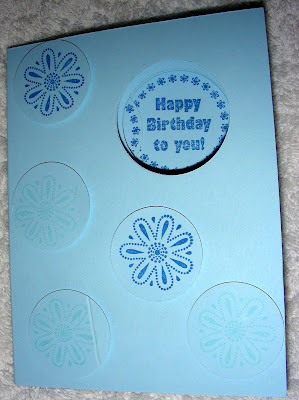
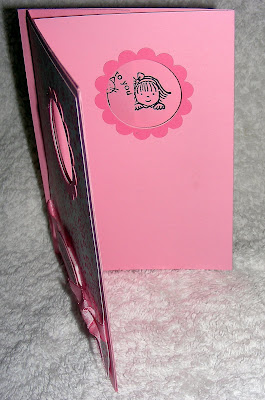
Here is a close up of it half open and you can see the second message sliding across.


Here is the one I made using the following:

Stampsets: Level 3 Hostess stamp Window Dressing, words from Crazy for Cupcakes, Short and Sweet and Nursery Necessities.
DSP from Sweet Always
Cardstock: Pretty in Pink and Pink Passion
Accessories: Pretty in Pink Taffeta Ribbon, Designer Label Punch and Large Oval Punch.


When it is half open you can see the second image just starting to appear on the left hand side.


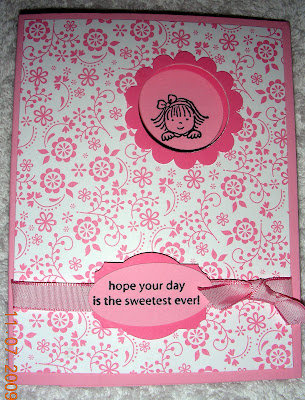
Here is a close up of the change from the first image to the second as the card is opening up.


Finally when the card is fully opened you just see the image of the cat wishing you a happy birthday. You would never guess we are a cat family would you.

Friday, July 10, 2009

Another Brayer Card

This is another of the Brayer cards I made this month.
This card was brayered with two colours mellow moss and bashful blue (and then sponged with a darker shade (bordering blue) around the edges to give a bit more depth to the card.
I combined two stamps from the Lovely as a Tree stampset and masked the smaller trees to get them side by side.
This was then layered on Night of Navy and Mellow Moss.

More Brayer Cards

As we have been doing Brayer cards at class this month I just have a couple more cards to share with you.
Once again I have used Cameo Coral and Black Cardstock, the background has been brayered onto glossy cardstock and stamped with stamps from Inspired by Nature and Garden Whimsy.
I often don't put a greeting on the card as most cards can be used as Thankyou or Birthday etc so I can put the greeting on when I am ready to use it.


This card has been made with one of the new In Colours - Tangerine Tango and black (again!!)

The front was first stamped with Versamark using the Upsy Daisy Stamp and then it has just been brayered with Tangerine Tango on the glossy cardstock. I haven't worried that the distribution is a little uneven as I am trying to get that misty look (well that's the look I decided it was going to be when it didn't brayer on all that evenly!!) After that was done I stamped over the top with Tangerine Tango a couple of times.

Thursday, July 9, 2009

Card Swap

This card which I did for the Card Swap looks a bit more vibrant in real life as Kiwi Kiss and Black go together so well, but is very quick and easy to do.

The card stock that were used: Kiwi Kiss and Black (I used the Scallop Punch on the bottom of the Black card)

DSP is Urban Garden which has to be one of my favourites, I have used it in so many of my cards.

The Stampsets used were: Upsy Daisy (another one of my favourites that I have used for lots of cards) and Short and Sweet.

Ribbon: 1/4" Basic Black


Wednesday, July 8, 2009

Card Swap

This is the fourth card that I did for the swap. This was done with the stampset "Echoes of Kindness" which is a Level 2 Hostess gift.

For this card I used Kiwi Kiss and Rose Red cardstock and I stamped the image on Watercolour Paper (with Stazon Ink) and coloured it in with WaterColour Crayons. The background has been stamped with Versamark to give a subtle outline of the flower.

The ribbons used were the 1" Rosed Red double stitched grosgrain with Old Olive 5/8" ribbon on top.

The "Best Wishes" stamp is from the Short and Sweet set


Card Swap

This is another card I made for the card swap, (these have all been kindly photographed by Sue Madex as I sent them all off to her for the swap without photographing - thanks Sue).

It is a very simple card but it is quite effective, as it is just certainly celery and pretty in pink card stock combined with DSP Tea Party. For the front I cut around the flower and put a strip of paper on the side just to balance the card.

On the inside I stamped with the stamp "Three Little Words", don't look too closely as the stamping is not all that straight.


Tuesday, July 7, 2009

Brayer Classes

This month's classes will be doing Brayer Resist in the lovely Taken with Teal colours. The second card will be using a Brayer and two colours which gives that lovely dusky glow to the card. The third card will be using the Reflection technique which I have seen on a number of sites and nearly everyone uses the very popular "Lovely as a tree" stamp set. If you are interested in doing this month's class there are still a few places in the class next Tuesday. My contact details are on the right hand side, along with the class times.